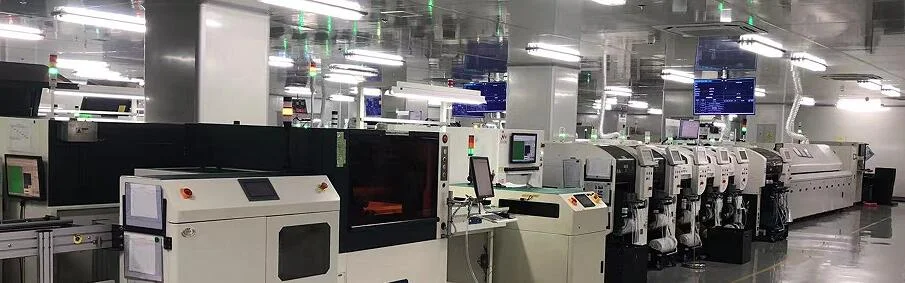
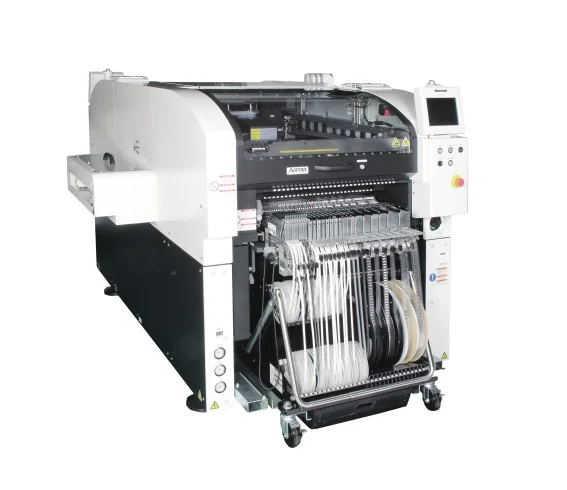
As a high-performance dual-track placement machine, the Panasonic NPM-W2's stability and precision directly determine the efficiency and quality of an SMT production line. However, during long-term high-speed operation, equipment inevitably faces wear, precision drift, and dust accumulation. Establishing a scientific, practical graded maintenance system is essential for reducing rejection rates, extending equipment lifespan, and ensuring production yield. Based on industry practices and equipment manuals, this article divides NPM-W2 maintenance into five levels: daily, weekly, monthly, quarterly, and annual.
I. Daily Maintenance: A 15-Minute Basic Defense
Daily maintenance is performed by production line operators during shift handovers or at the end of the day. Its core tasks are to remove accumulated dust, eliminate obvious faults, and ensure the equipment is in optimal standby condition for the next day.
1. Machine Cleaning and Waste Removal: Use lint-free cloths to wipe the machine body, touchscreen, and operation panel. Focus on cleaning scattered components and waste tape inside the equipment, and thoroughly empty the rejection recovery box and waste tape container. Dust is a major enemy of placement machines—it not only affects heat dissipation but can also cause wear to precision guide rails.
2. Air Pressure System Inspection: Confirm that the main air supply pressure remains stable at 0.5–0.7 MPa. Open the drain valve on the air receiver to drain condensed water. If the compressed air contains excessive moisture, it can corrode solenoid valves and cause nozzle pickup failures.
3. Basic Nozzle Inspection: Remove the high-frequency nozzles used during the day and use thin wires or specialized cleaning pins to clear blockages inside the nozzle holes. Visually inspect the nozzle tips for deformation, cracks, or wear. Nozzles are the "fingers" of the placement machine—any minor damage can lead to recognition errors or placement offsets.
4. Track and Feeder Platform Cleaning: Use a vacuum cleaner or air gun to blow off the feeder mounting platform and PCB conveyor rails, removing debris to prevent dust from scratching PCB edges or causing board jams during conveyance.
5. Safety Device Confirmation: Manually trigger the emergency stop buttons and safety door switches to confirm smooth return and no sticking, ensuring the safety circuit is always effective.
II. Weekly Maintenance: 1 Hour of Deep Cleaning and Lubrication
Weekly maintenance is performed by equipment technicians, shifting focus to the head, vision, and transmission systems for light-duty maintenance and minor precision corrections.
1. Placement Head and Nozzle Deep Maintenance: Place nozzles into an ultrasonic cleaner (using alcohol or specialized cleaning solution) for deep cleaning, while replacing aged nozzle filter foam. Inspect the nozzle buffer springs and O‑ring seals—replace immediately if aging or deformation is found. Apply a small amount of lubricant to the sliding parts of the placement head's Z‑axis (vertical) and R‑axis (rotational). It is recommended to use the Panasonic-specified grease N510048190AA. After application, run the machine idle to distribute the grease evenly.
2. Vision System Cleaning: Use a lint-free cloth moistened with a small amount of IPA (isopropanol) to gently wipe the linear camera and 2D recognition lens cover. Solder paste dust on the lens is a common culprit for component recognition errors—cleaning must be done gently to avoid scratching the lens surface.
3. Track and Conveyor Mechanism: Clean the conveyor belt and rail surfaces. Inspect the track width adjustment lead screw and apply grease to ensure smooth PCB conveyance without obstructions.
III. Monthly Maintenance: Systematic Mechanical and Electrical Inspection
Monthly maintenance should be led by the equipment supervisor and takes about 2–3 hours. This is a systematic health check of the equipment's "skeleton" (transmission) and "blood" (pneumatics).
1. X‑Y Axis Transmission System Maintenance (Critical Step): Wipe the linear guide rails and lead screws on the X‑Y gantry to remove old, hardened, and darkened grease. Re-apply the manufacturer-specified grease (e.g., N990PANA-027). Key Tip: After applying new grease, run the equipment at low-to-medium speed across the full stroke for approximately 30–60 minutes to allow the grease to fully penetrate the slide blocks. Then, clean excess grease that has extruded from the rail ends to prevent oil splatter during operation from contaminating PCBs.
2. Full Vacuum System Inspection: Disassemble the vacuum pump, and clean the primary and secondary filter elements. If the vacuum generator filter elements are heavily soiled, replace them directly. Simultaneously, check the vacuum line seals and identify minor air leaks, as insufficient vacuum directly leads to a sharp increase in rejection rates.
3. Feeder Calibration: Remove all feeders in use from the trolley and use the NM‑EJW2A feeder calibration tool to uniformly calibrate pickup positions and tension. Clean the gear ratchets and replace deformed cover tapes.
4. Electrical Wiring Inspection: Check servo drivers and solenoid valve terminal connections for looseness, and clean dust from inside the control cabinet. Dust accumulation on electrical components can cause short circuits or poor heat dissipation.
IV. Quarterly Maintenance: Machine Precision Calibration
Quarterly maintenance requires professional engineers with appropriate qualifications, as it involves modifying core equipment parameters.
1. Placement Center Reference Calibration: Perform machine origin return calibration and nozzle center compensation. After long-term operation, thermal expansion, contraction, and mechanical wear can cause the placement head to physically drift, requiring software-based positional compensation.
2. Feeder Exchange Trolley Maintenance: Inspect the mechanical arm positioning accuracy of the Feeder Exchange Cart and perform origin calibration. Check CAN bus or EtherCAT communication connections to ensure that automatic feeder change functions operate without delays or interruptions.
3. 3D Camera and Light Source Verification: Inspect the LED light source brightness of the 3D coplanarity inspection camera. If attenuation is found, replace it promptly to ensure measurement accuracy for BGA and other odd‑form components.
V. Annual Maintenance: Comprehensive Overhaul and Preventive Replacement
Annual maintenance is best scheduled around the Spring Festival or National Day holidays and involves comprehensive replacement of aged consumables and system-level debugging.
1. Bulk Replacement of Critical Consumables: Uniformly replace all nozzle filter foams, seals for each axis, belts, and worn solenoid valves.
2. Annual Electrical and Safety System Inspection: Check the aging condition of all cables, relays, and power supply modules, and measure grounding resistance to ensure absolute operational safety.
3. Software and Parameter Backup: Perform a full backup of equipment parameters and inherent values. As production data accumulates, periodically clear system caches and apply optimized patches to prevent downtime caused by software bugs.
Summary Recommendations: Maintenance for the NPM‑W2 should follow the scientific rhythm of "daily cleaning, weekly nurturing, monthly inspection, and annual overhaul." It is particularly important to note that excessive grease application is not better—too much grease can cause oil splatter and contaminate products during operation. Additionally, various cleaning agents (such as alcohol or thinner) must never be sprayed directly onto the equipment surface or internal electrical components; they should always be applied using the "wipe with a moistened cloth" method. Establishing a detailed maintenance log to record the replacement timing and cycles of each component is key to achieving whole-lifecycle equipment management.